The Love Entwined (LE) sew along starts Jan 2025 for the Esther Aliu group. For those of us that previously made this quilt, or a version of it, we know it is a marathon rather than a sprint. Much preparation is needed and it is never too early to get a start on it. (Nor too late!)
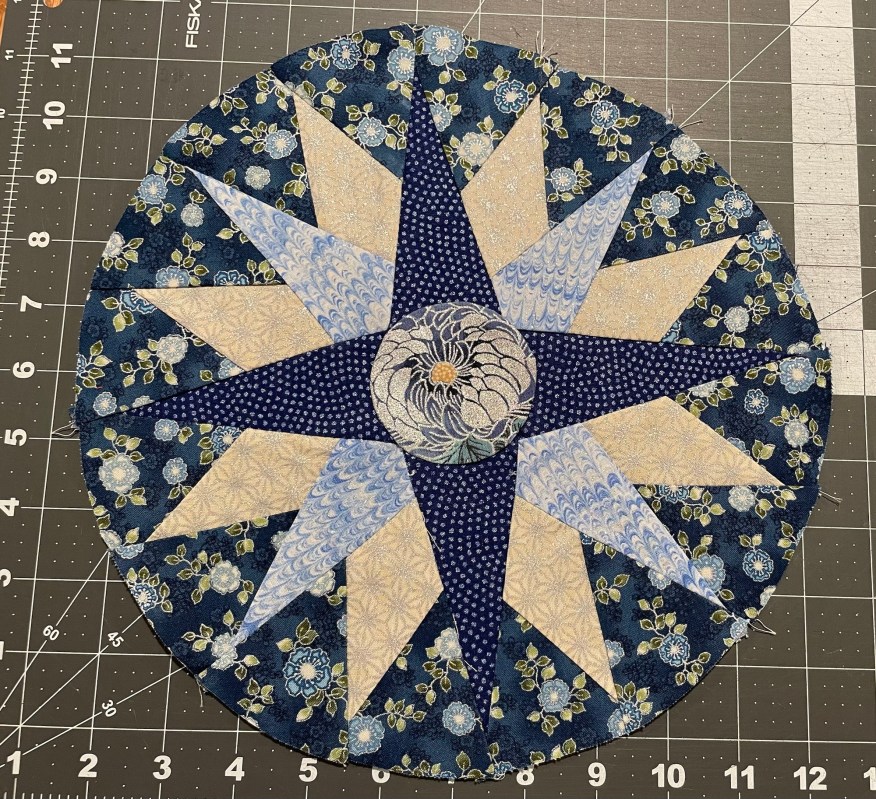
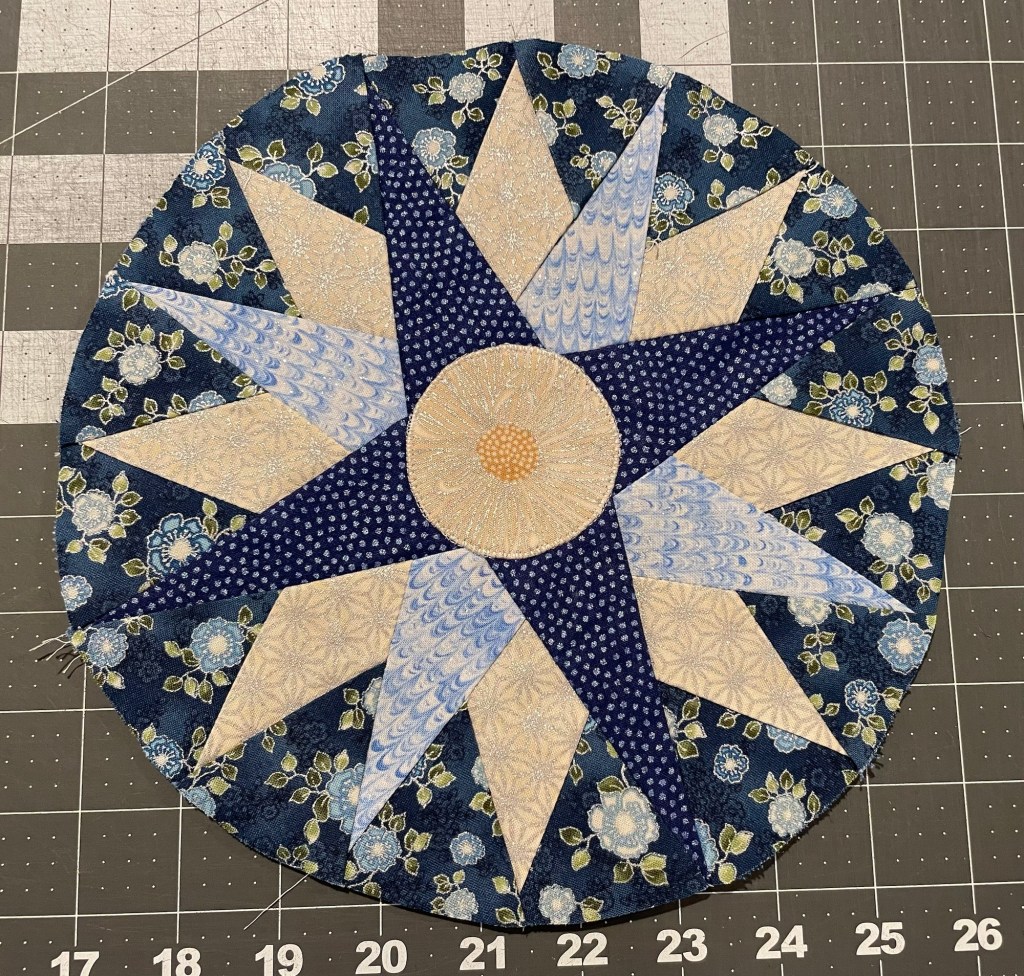
Some choose to leave the compass for later. Esther did hers first and I did as well. Why? Because I like to have a “color guideline” in a major applique piece. I can wander away from my colors if I am not focused on my fabric choices!
Yes, we can redo our colors if we want, but with my dark background and large scale print in the mix, I need to stick to my color plan for it to come together. This week there will be two blogs, the making of the compass and another on my color choices!
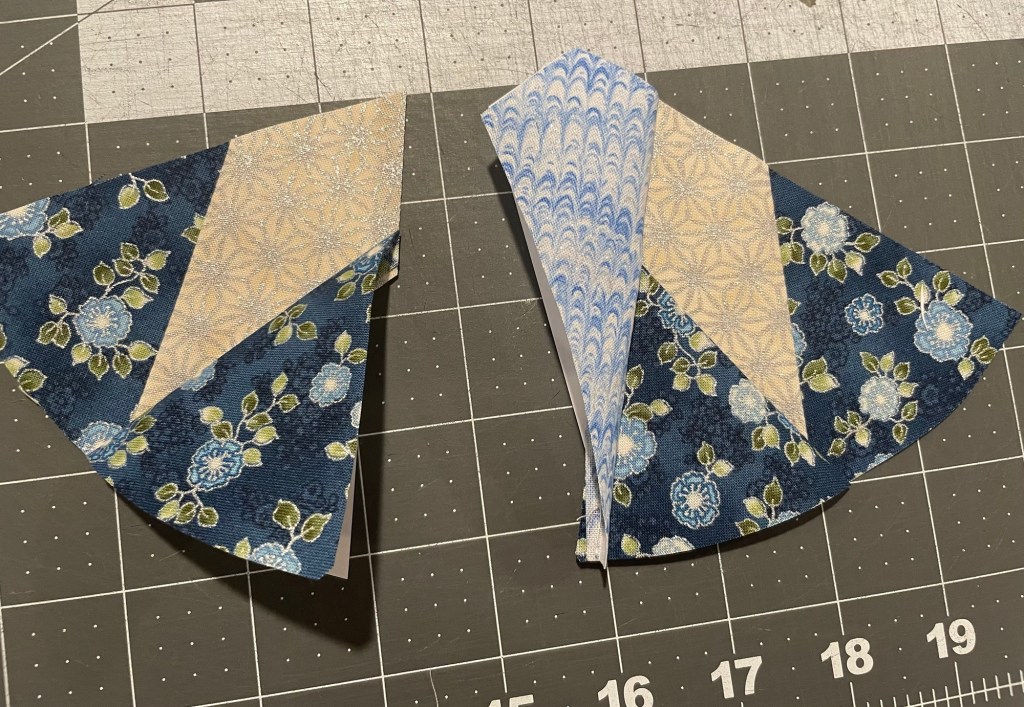
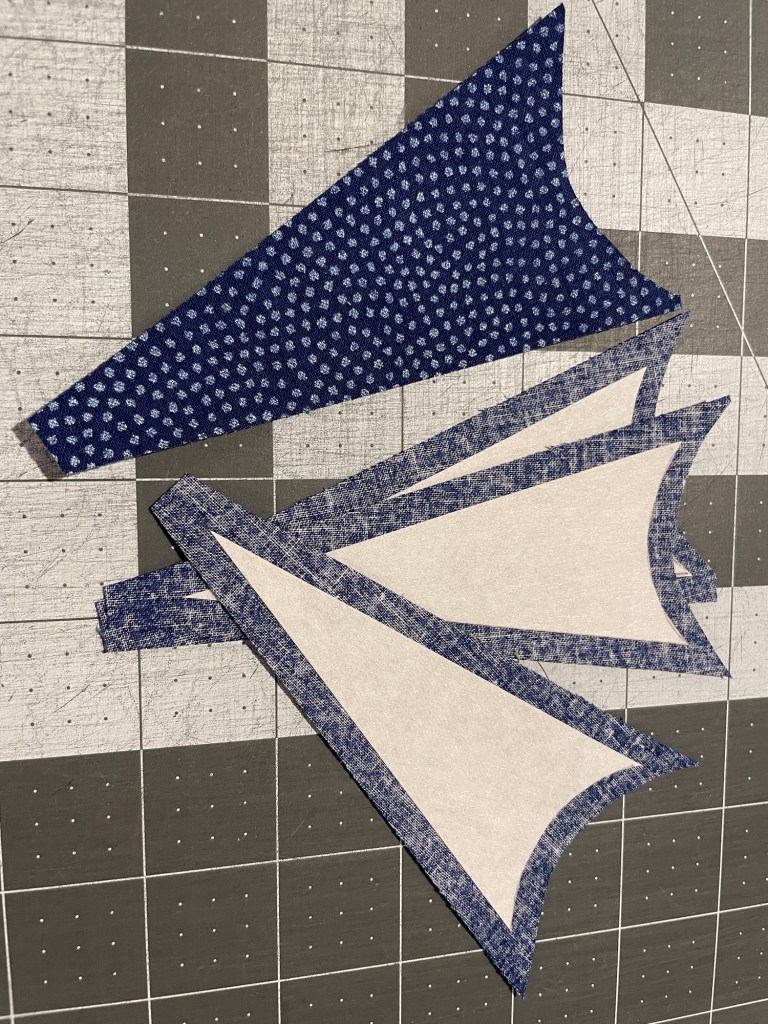
I chose to make my compass using a paper piecing method. Previously, I made Love Entwined 2 (which is primarily the LE center) using straight applique. While sufficient, it certainly could be improved upon! I made a first attempt at the center (more on that towards the end of the blog) using one of the pattern methods of cutting iron on, washable media, applying to the fabric, cutting a seam allowance around it and sewing each piece together. It was a bit wonky and I decided for my second attempt to do paper piecing.
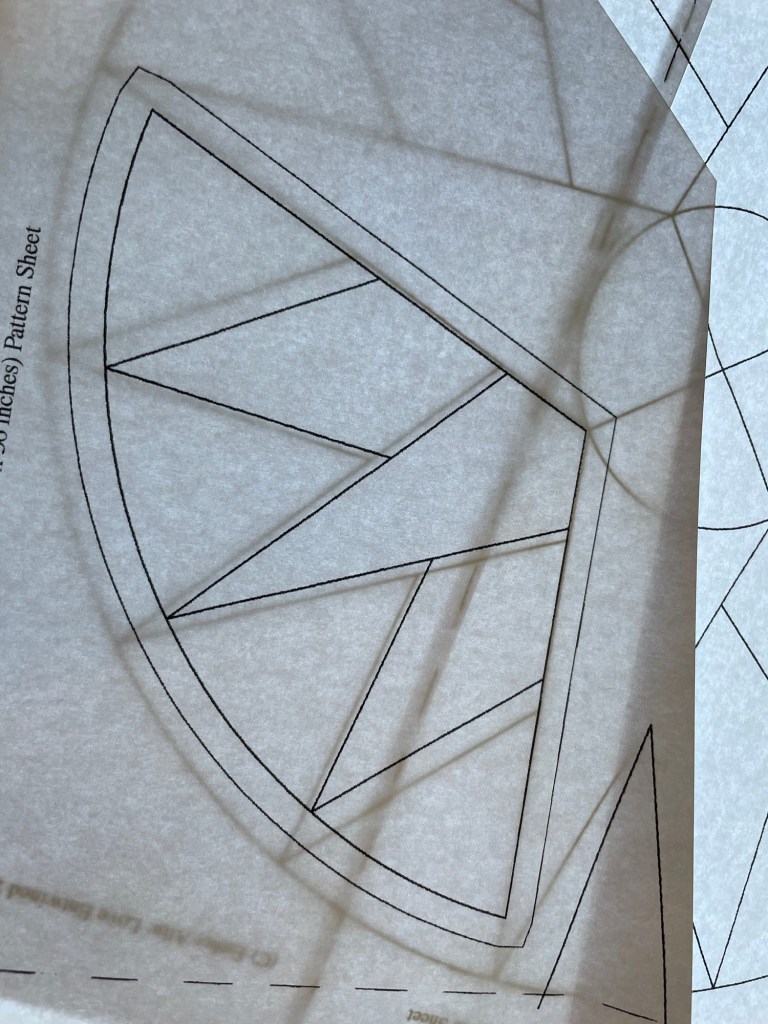
We start with the quarter template.
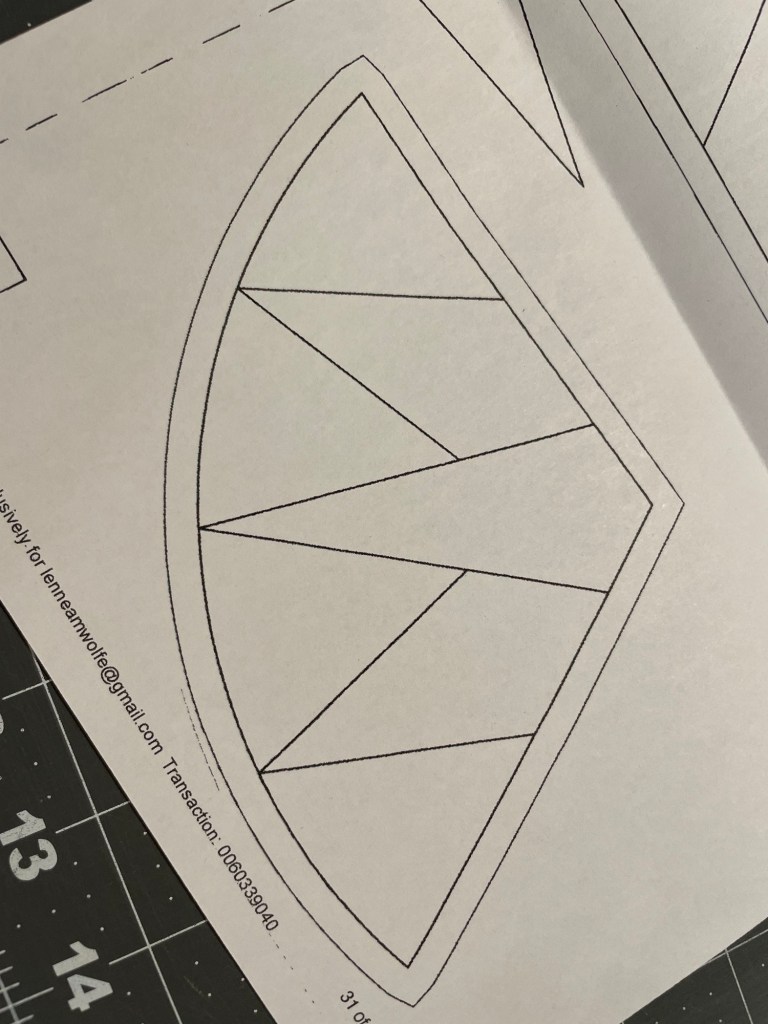


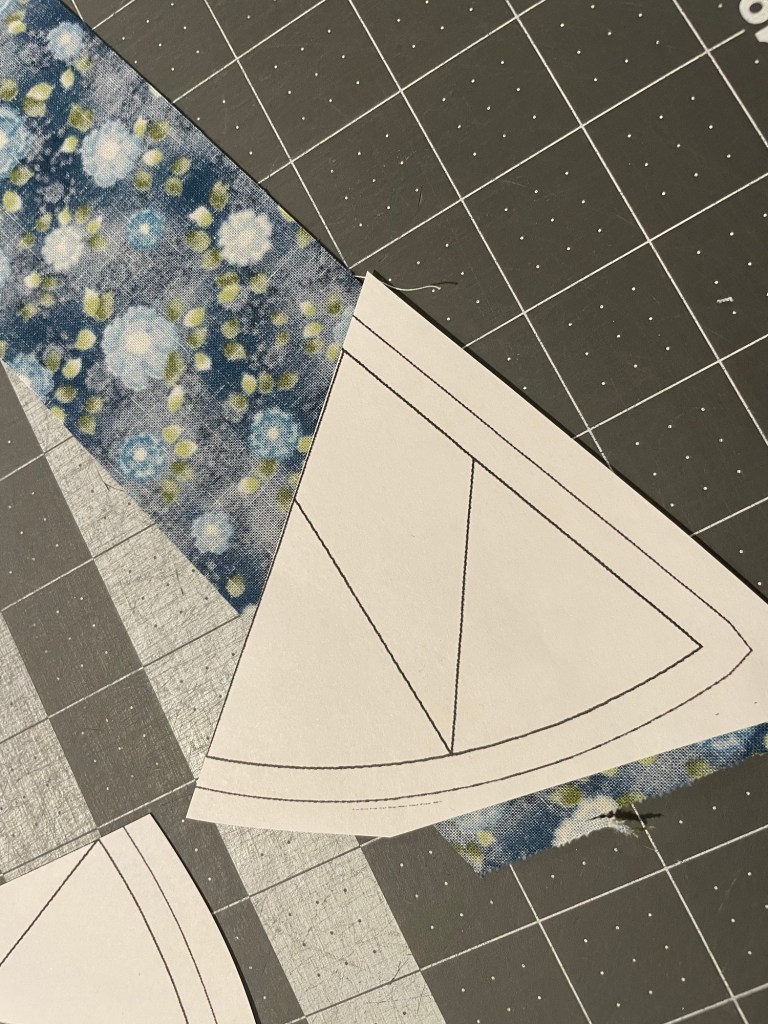

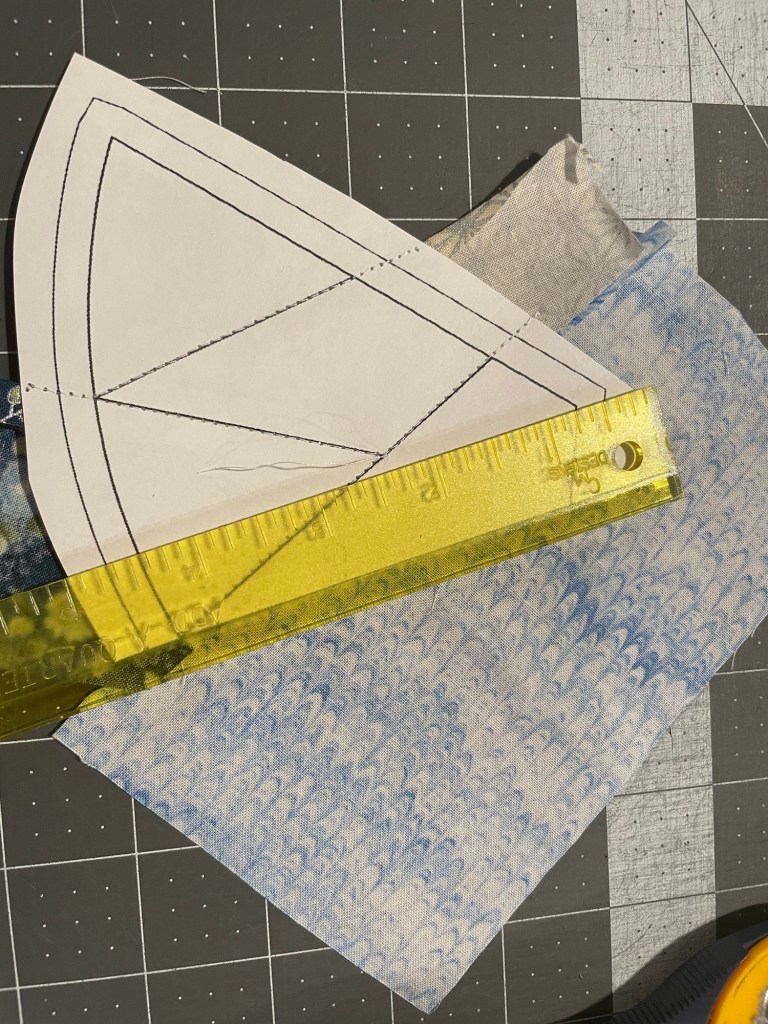
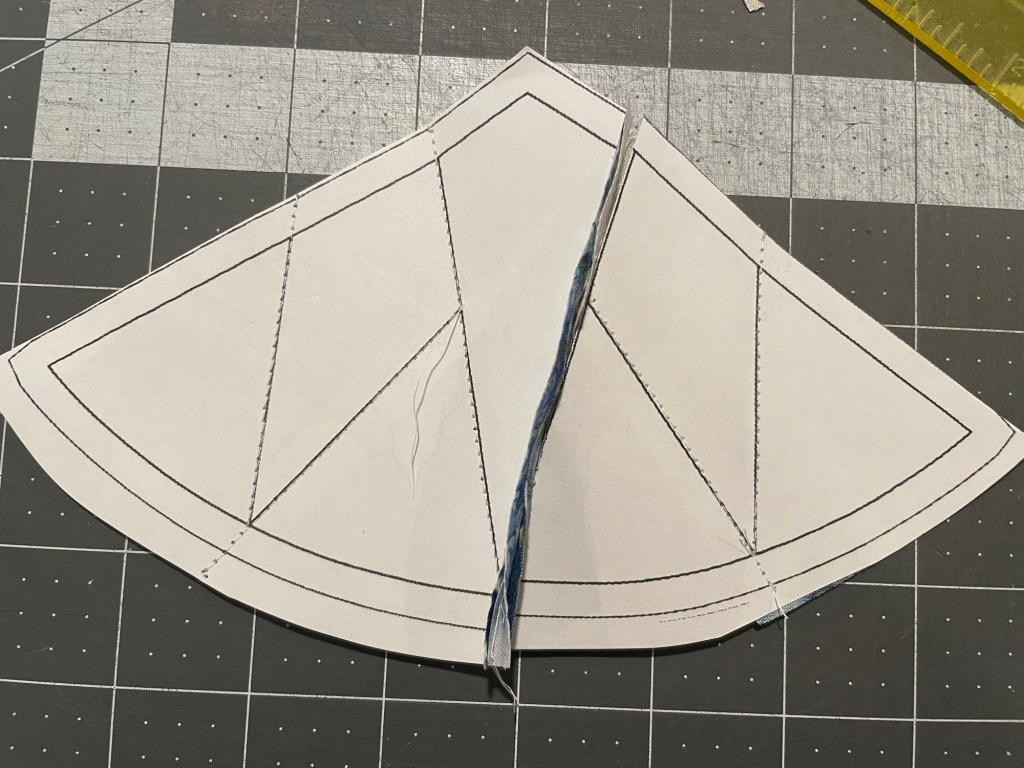
We cut the original template, so need to make sure that we add in our 1/4” seam allowances where cut. I am using my add a quarter small ruler for this.


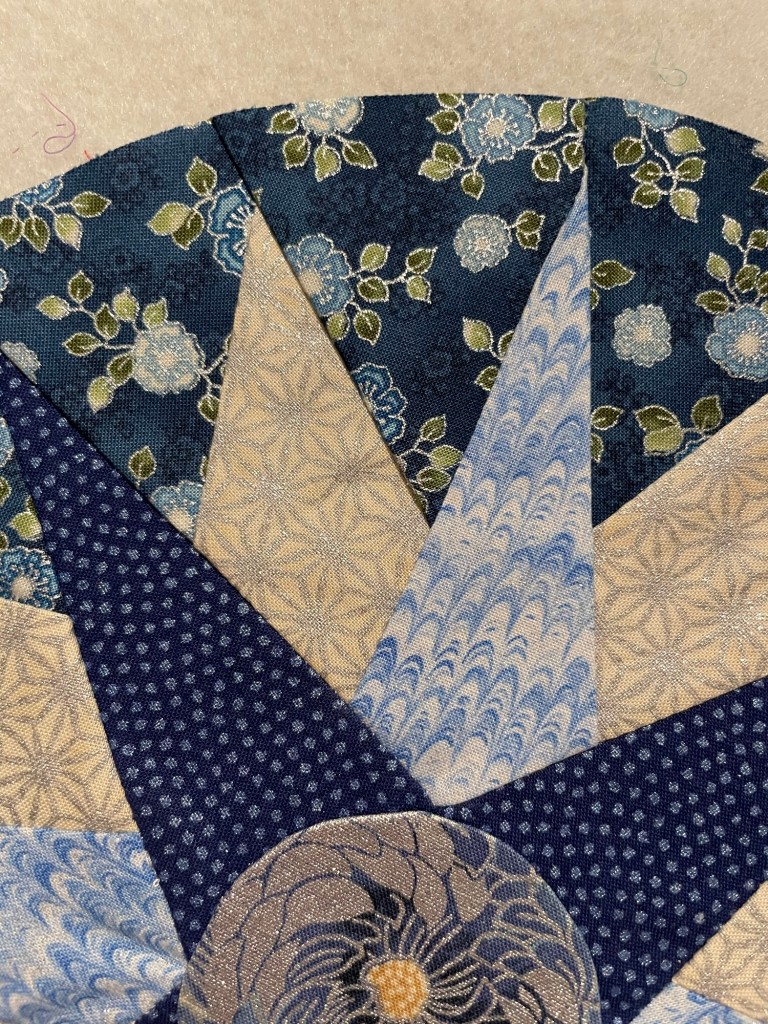


It was really exciting to see my dark grunge background with the center pinned on!
A WORD OF CAUTION Re: Printing and Scaling:
I live in the US and my printer does not take A1 paper. It also doesnt take a stack of legal size, so I print out my Esther Aliu patterns at 92%. This has always worked in the past. But not now!
The template did not print at the same scale as the quarter sections. But I did not check them when I made my first run at the compass. This resulted in a too small compass.

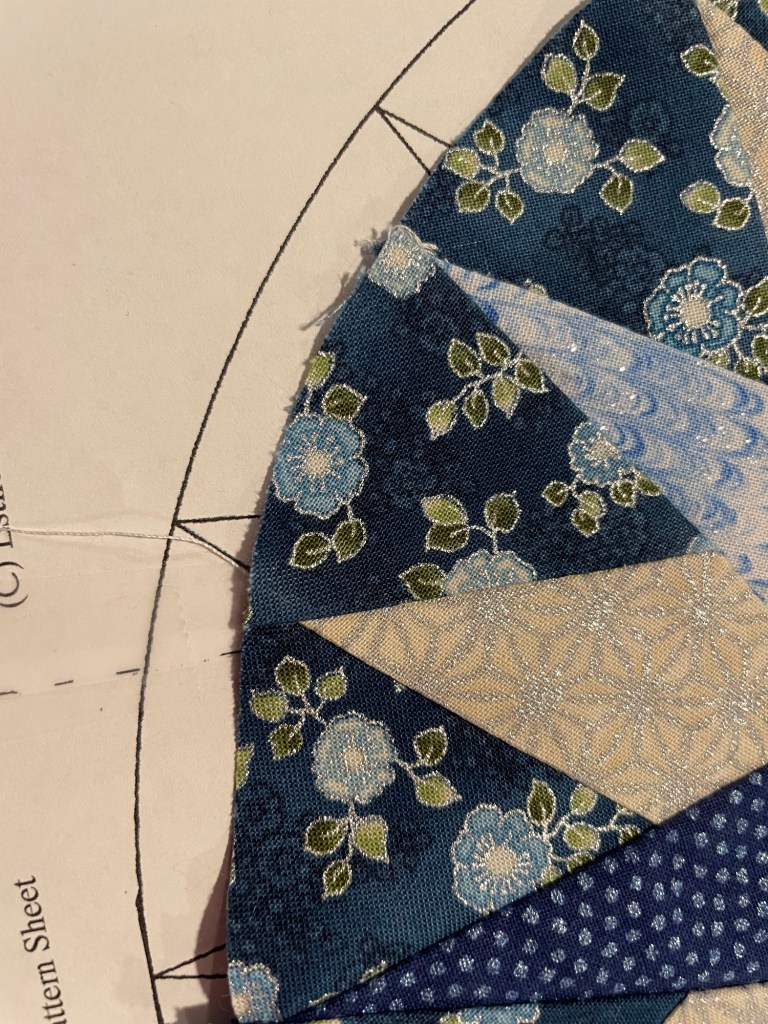
Please, before you start sewing, take a moment and check that your quarter sections line up perfectly with the template.
When I did the compass a second time, I left a little extra around the bottom edges of those blue flowered triangles to add some wiggle room on my circle, assuring a nice fit under the ring that comes next. One can always trim a too long edge, but too short is a whole other issue!
The compass is the focus for this project; everything else flows from it. I feel like we owe it to this wonderful pattern to create them as best we can. I hope you find it helpful.
Happy applique adventuring!
Lennea

hi great, great explanation, the colours are perfect. Happy sewing x
LikeLiked by 1 person
Excellent tutorial! Thank you for breaking it down so completely.
LikeLiked by 1 person
GREAT tutorial on that compass Lennea. It stumped so many members in 2013!. Seeing it worked as you have constructed it will make it so much easier for many. I had no problem assembling my compass but on my goodness LE would not except the colours I choose. Yes this quilt talks to you and will ague with you LOL. I made 5 compasses and my last one was nothing like what I wanted to start with LOL.
LikeLiked by 1 person
Thank you! That compass is a tricky color challenge. It needs contrast or gets lost. It has to cooriinate, but also stand on its own. I have choosen a restrained color plalette, which is a bit frustrating for me, but this version has its own opinion!
LikeLike